0075: Nodes-n-noodles II – Mouse Noodling
We’re still working our way through Phase One of this nodes-n-noodles concept and this time around, we’ll leave static noodles behind and get some animation happening.
Controlling the Noodle with the Mouse


The next step toward drawing a noodle connection between nodes entails two things:
- using the mouse position as the curve’s end point, and
- taking control of window redraw (animation).
To that end, we’re going to borrow from an earlier Cairo animation example Blog Post #0064 as well as the mouse tracker example Blog Post #0015 we looked at back in March.
From these earlier examples, we’re reminded that:
- the mouse pointer’s position is supplied by the
onMotionNotifysignal, and - gaining control over window redraw means working with a
Timeoutobject.
Draw and Redraw
The Timeout object, as we saw before, decides when we’ll call a function similar to this example’s onFrameElapsed() function (which is taken, unchanged, from the mouse tracker example):
bool onFrameElapsed()
{
	GtkAllocation size;
	getAllocation(size);

	queueDrawArea(size.x, size.y, size.width, size.height);

	return(true);

} // onFrameElapsed()
What it does is:
- instantiate a
GtkAllocationobject from which we… - extract the size of the
DrawingArea, and - call for a redraw.
The Cubic Bezier’s Starting Point
For now, we’ll use a hard-coded starting point and turn our attention to another problem…
Grabbing the Mouse Pointer Position
We can use the onMotion() function from the mouse tracker example to grab the mouse pointer position and use those x/y coordinates, along with the hard-coded starting point coordinates, to set our control points. From the previous post in this series, here’s a reminder of what those control point coordinates will be:
- the coordinates of the first control point are:
xis the same as the end point’s x,yis the same as the start point’s y,
- the second control point’s coordinates:
xis the same as the start point’s x, andyis the same as the end point’s y.
public bool onMotion(Event event, Widget widget)
{
	// make sure we're not reacting to the wrong event
	if(event.type == EventType.MOTION_NOTIFY)
	{
		// get the curve's end point
		xEnd = event.motion.x;
		yEnd = event.motion.y;

		// Recalculate the control points so we always have
		// a nice-looking double curve.
		controlPointX1 = xEnd;
		controlPointY1 = yStart;
		controlPointX2 = xStart;
		controlPointY2 = yEnd;
	}

	return(true);

} // onMotion()
And indeed, in the onMotion() function, we’re doing just that. After grabbing the mouse pointer position to use as the curve’s end point (xEnd/yEnd), we set the controlPoints and we’re ready to draw the curve. And the drawing itself is handled by the onDraw() function.
How the onDraw() Function Changes
Two things change in onDraw():
- a
Timeoutobject is harnessed to set the redraw rate in frames per second, and - instantiation of the control point coordinates has moved up to the preamble section of the
MyDrawingAreaclass.
And that leaves the onDraw() function looking like this:
bool onDraw(Scoped!Context context, Widget w)
{
	if(_timeout is null)
	{
		_timeout = new Timeout(fps, &onFrameElapsed, false);
	}

	// set up and draw a cubic Bezier
	context.setLineWidth(3);
	context.setSourceRgb(0.3, 0.2, 0.1);
	context.moveTo(xStart, yStart);
	context.curveTo(controlPointX1, controlPointY1, controlPointX2, controlPointY2, xEnd, yEnd);
	context.stroke();

	return(true);

} // onDraw()
And the MyDrawingArea preamble now looks like:
Timeout _timeout;
int fps = 1000 / 24; // 24 frames per second
double xStart = 25, yStart = 128;
double xEnd, yEnd;
double controlPointY1 = 128, controlPointX2 = 25;
double controlPointX1, controlPointY2;
The Constructor
As with the previous example, the constructor remains lean:
this()
{
	addOnDraw(&onDraw);
	addOnMotionNotify(&onMotion);

} // this()
Hook up the signals and we’re done.
Conclusion
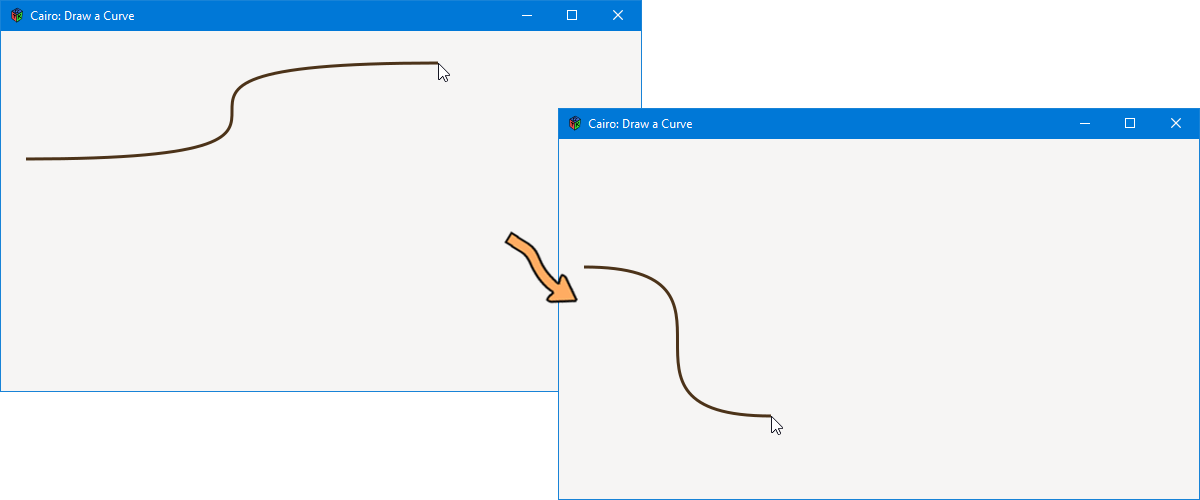
So there you have it, run the example and move the mouse around within the window. The curve redraws as the mouse moves and always describes a cubic Bezier curve.
Next time, we’ll take another step wherein a mouse button is clicked to start the drawing of the curve.
Comments? Questions? Observations?
Did we miss a tidbit of information that would make this post even more informative? Let's talk about it in the comments.
- come on over to the D Language Forum and look for one of the gtkDcoding announcement posts,
- drop by the GtkD Forum,
- follow the link below to email me, or
- go to the gtkDcoding Facebook page.
You can also subscribe via RSS so you won't miss anything. Thank you very much for dropping by.
© Copyright 2024 Ron Tarrant
